Partitioning
blivet-gui supports all basic operations among disk partitions.
Creating new partition
Select disk from the list of Disks.
From Partitions tab select free space line.
Click on Add button in toolbar or just press Insert.
Create new partition window will be opened. If you have new disk without partition table, blive-gui will ask you to create one. See Disklabels.
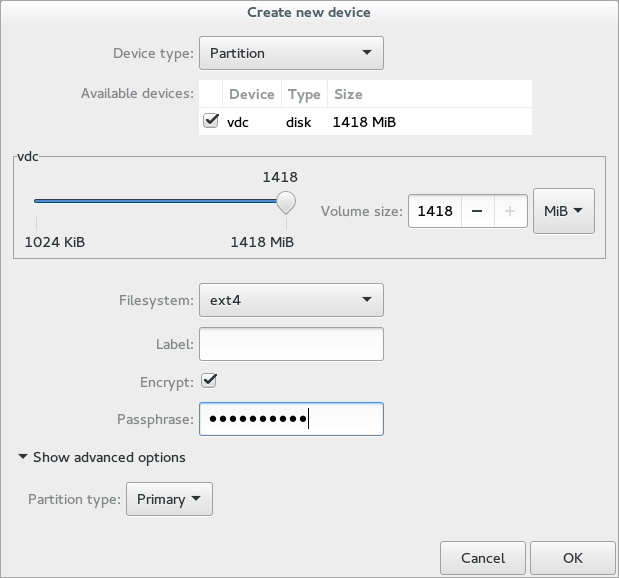
Set Device type to Partition (it should be preselected).
Set size for your new partition.
Choose Filesystem. Optionally you can set Label too.
It's possible to create encrypted partition using LUKS/dm-crypt. Check the Encrypt option and fill in passphrase.
Under Advanced options is possible to select type of partition (Primary, Extended or Logical)
Hit OK to create partition.
All changes you make are only temporary. They won't be written to disks until you use the Apply button. See Actions.
Deletening partition
Only partitions that aren't currently in use can be deleted. You can use Unmount button to unmount active partition.
Select disk from the list of Disks.
From Partitions tab select line with partition you'd like to delete.
Click on Remove button in toolbar or just press Delete.
Confirm partition deleting
All changes you make are only temporary. They won't be written to disks until you use the Apply button. See Actions.
Editing partition
Only partitions that aren't currently in use can be edited. You can use Unmount button to unmount active partition.
Select disk from the list of Disks.
From Partitions tab select line with partition you'd like to edit.
Click on Edit button in toolbar. Edit partition window will be opened.
Select new size for the partition. (This option is available only for some partition types.)
Optionally you can select new Filesystem and Label for the partition.
If you select new filesystem, all data on the partition will be lost!
All changes you make are only temporary. They won't be written to disks until you use the Apply button. See Actions.